Accomplishments
- Research Reconstruction
- User Interface Improvements
Bonus
- Image Enhancements
- AI Image Editing Research
- Project Page Improvements
- Long Text Improvement
Reconstruction research has continued to be the focus this week, identifying edge cases and discovering a pipeline that is effective and efficient has been the primary goal. While running tests, I was able to implement a variety of other improvements. These include new user interface features for organizing projects, adding structure to the individual image view and edit tools, and updating the tour to work better with long text.
Reconstruction Research
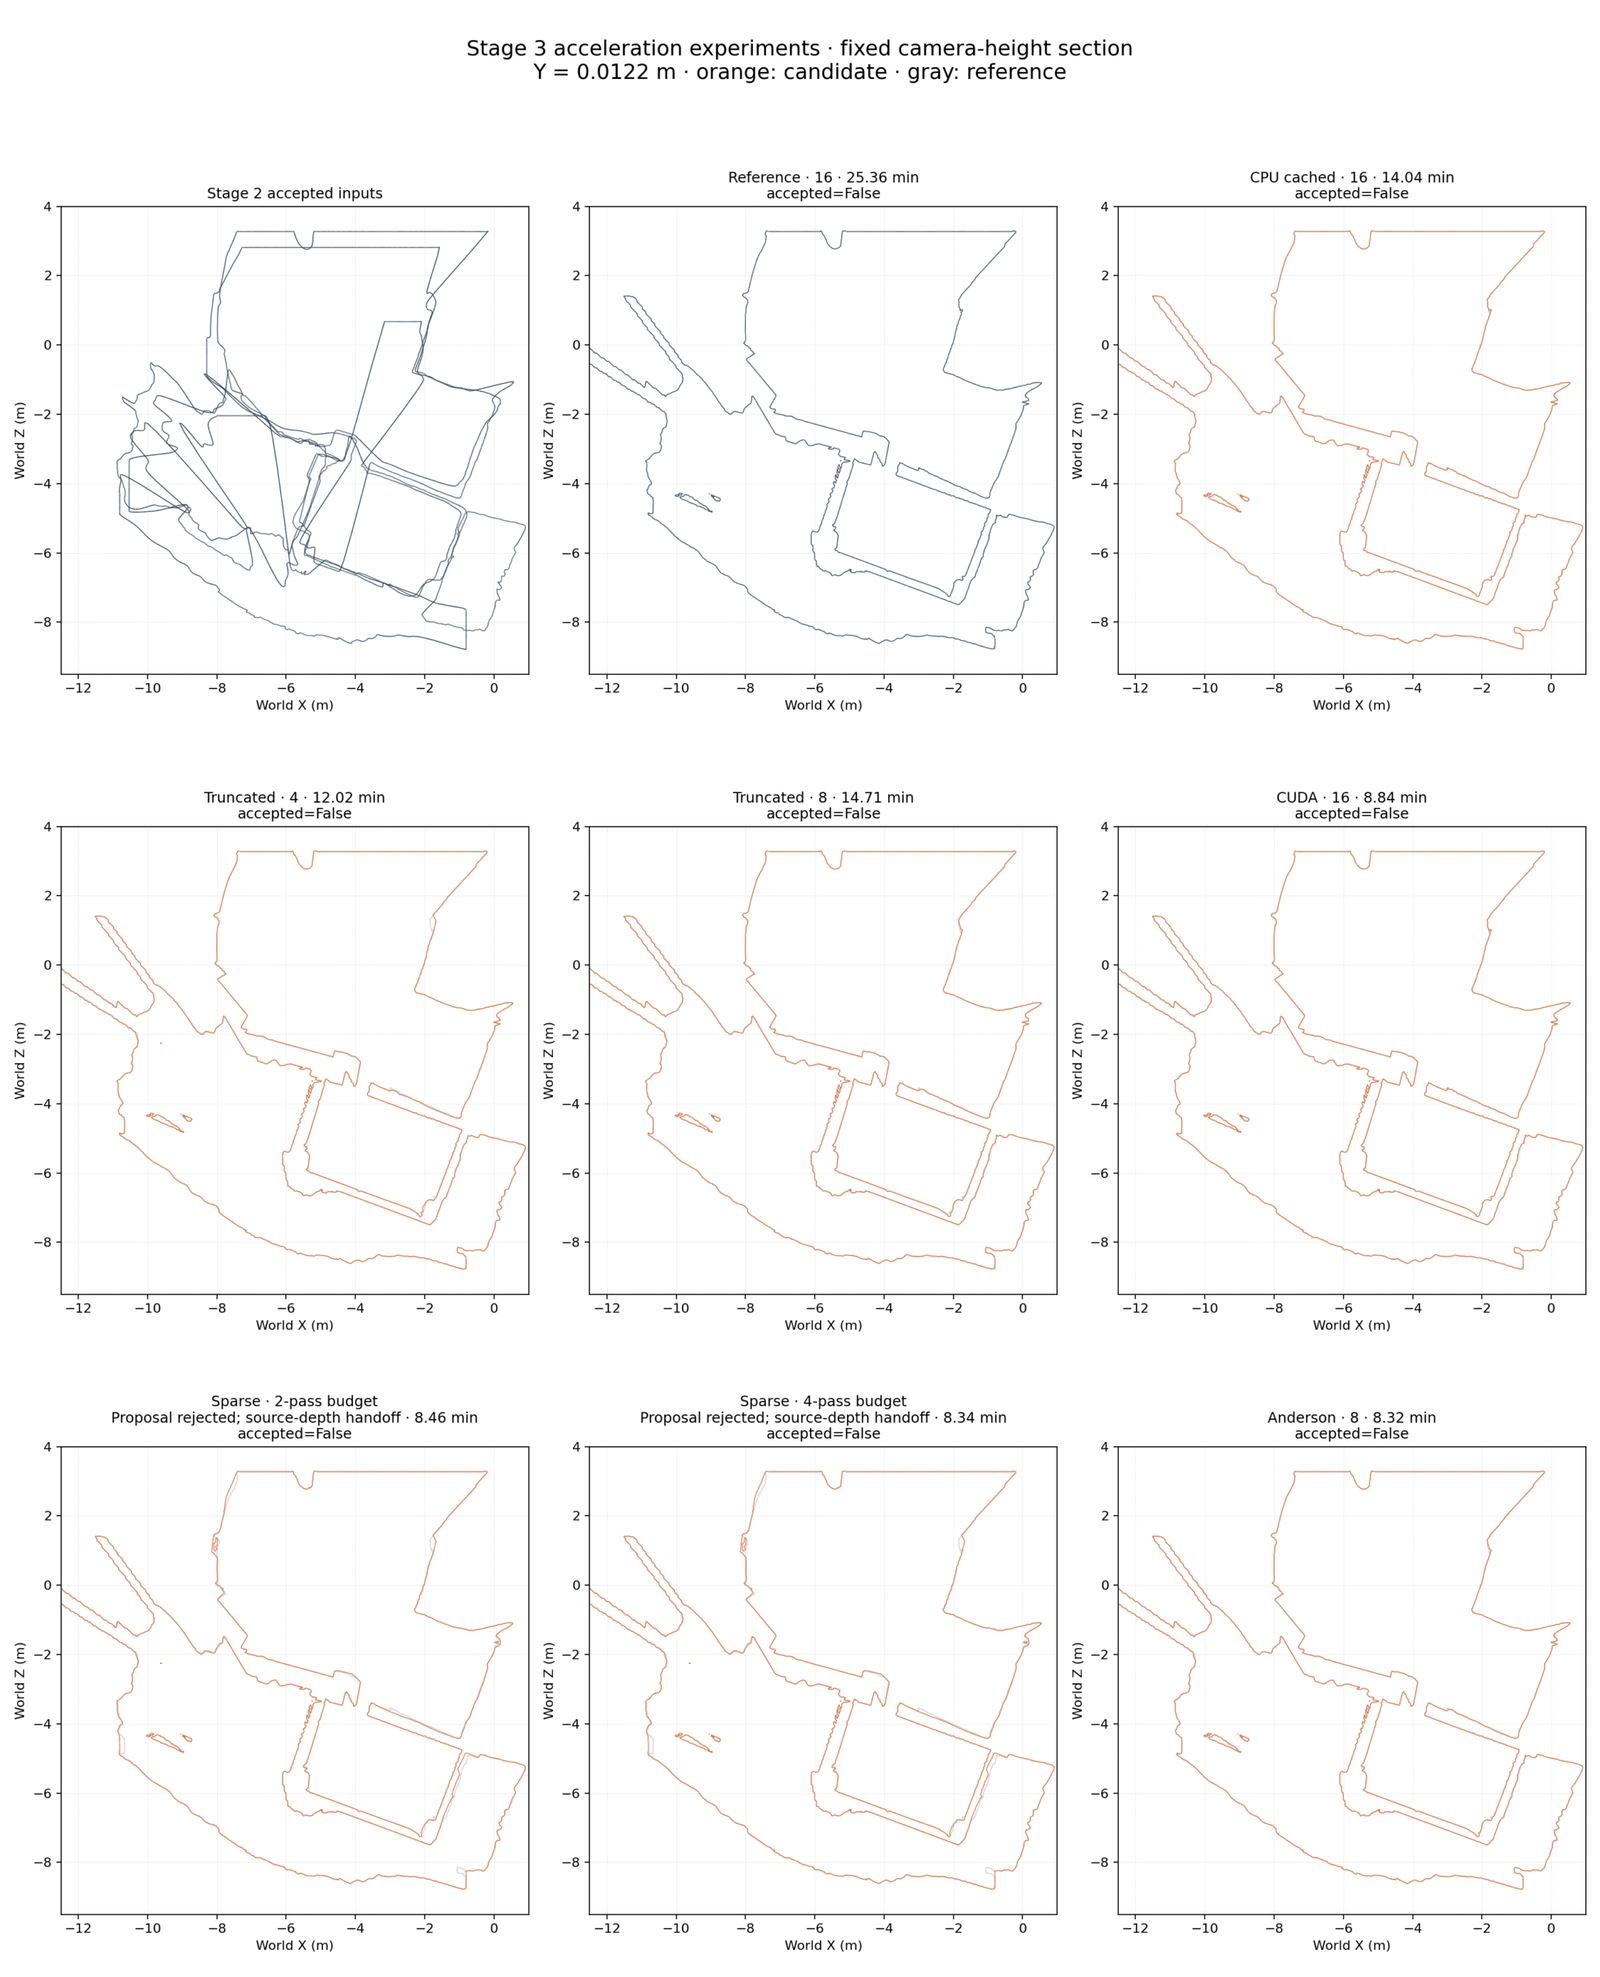
This week I further clarified the requirements needed for the final reconstructed 3D model and attempted a variety of solutions to achieve them. For a 3D model to feel more realistic while traversing it, it must conform to the real world in a few ways.
One way is that objects rarely appear at infinite distances. Previously, some objects and the sky would appear infinitely far, and a sharp cut could be seen in this hole on the mesh, which could be jarring when traversing. To resolve this I added cubic limits to where each individual camera can address. This makes it so that sky, and the objects at its edge, do not appear infinitely far.
Another issue is when one camera sees into the room of another camera. This happens due to a feature called “Backface culling”, and occurs when part of a camera’s wall gets lost while reconstructing. It can see through the back of another wall, into another room. This causes strange depth discontinuities while moving between images in a scene, and opens the opportunity for the user to mis-click and go to a space they had not prepared for. The added requirement is to ensure no camera sees through the backface of another, which in turn ensures that the camera’s walls are often present and in it’s expected positions.
Two other cases were determined as beneficial: alignment and conflict resolution. The camera positions can be imperfect. Distortion, changes in light, and biases of the model can affect how cameras are positioned in 3D space. Even if the position of the camera is correct, the geometry it projects into 3D can be incorrectly estimated. This can happen on mirrors, walls, and sometimes doorways may appear flat, or two walls may appear at different distances. To resolve these we need to align similar walls, and resolve conflicting geometry.
Aligning similar spaces is the simpler task. We already can determine confidence of specific points based on various criteria like distance from the camera and consensus from multiple cameras. This means that we can take not-so-confident points and move them along a lint until they clamp to their confident counterparts. This deforms estimated depths and establishes a consensus.
Conflicts are a separate set of challenges. They can most easily be thought of as opposing walls. When one rooms wall goes beyond the placement of another room’s wall we must find an agreement so that the walls are on their own sides. This part is somewhat simple, each wall faces opposing directions, we can identify that and move them based on confidence. It gets more complicated at angles. When identifying how to deal with the corners near the ceiling and floor, and how to move them, or roughness along the wall. One option may be to identify that they are in different rooms. This is great for many cases, however, what about when the geometry is in the same room? Perhaps two cameras see the same waist-high fence from different sides? It would be ideal to have a robust conflict resolution for these cases.
To solve conflict I considered an option where each point would be addressed within a voxel, and identify conflicting spaces based on their points. Once identified, we could move the group of voxels related to the conflicting region, and some connected vertices within adjacent voxels, until a consensus is reached. This seemed to greatly improve the edge cases (literally) and be a solution that would work even for objects in the same space. However, it was still imperfect and the time to complete was very high.
This week came with many attempts, further refinement of the requirements, and new ideas for how to provide a meaningful solution. New options are currently being pursued.
Bonus: Prompt Edits
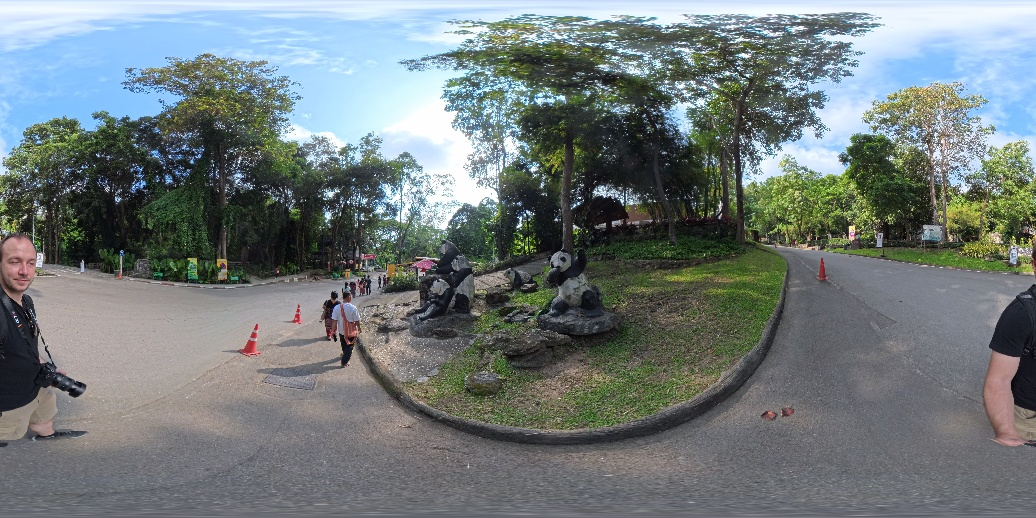
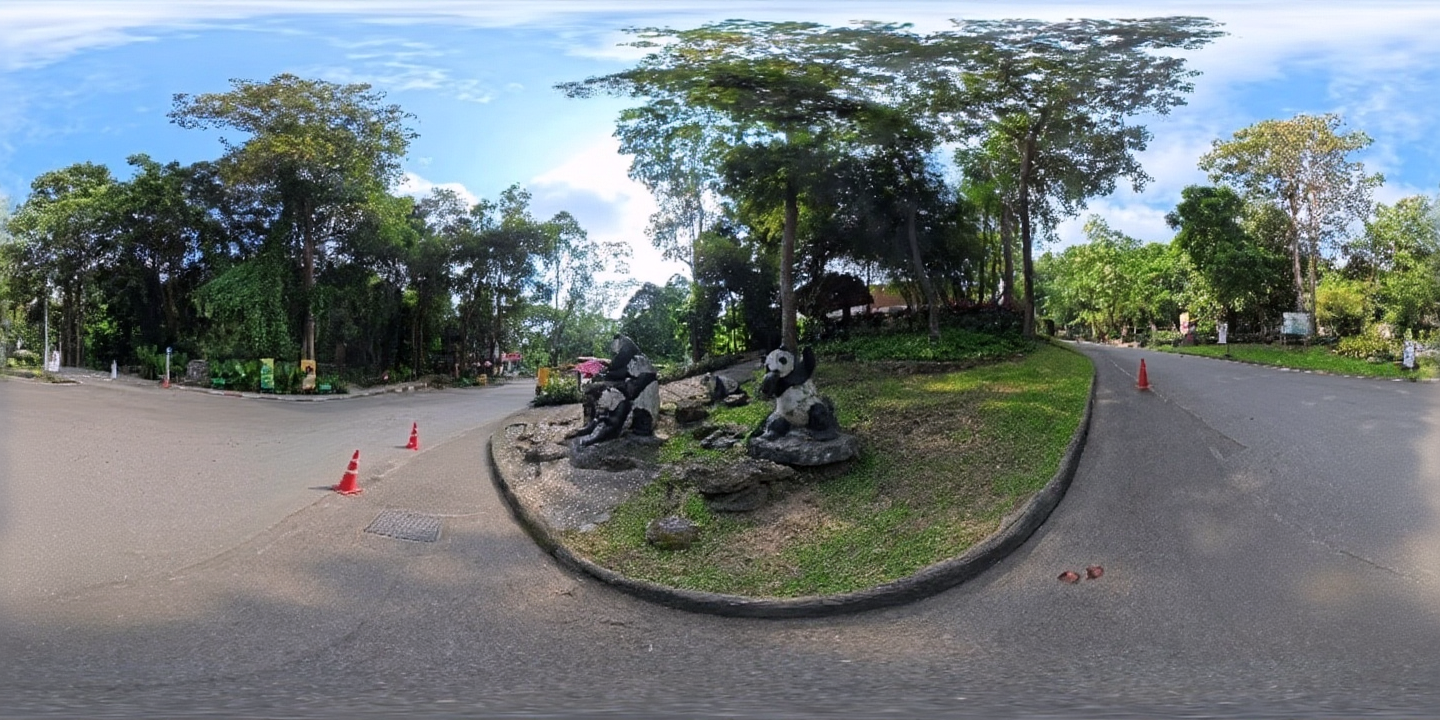
Another new feature for image editing is prompt edits. I identified this use case by viewing my gallery view photos. Sharp galre, scuffs on a lense, or a bit of moisture can add a lot of blur and problems to an image. While not perfect, local models have gotten incredibly capable of editing images.
This feature allows for the whole image to be edited, or just a masked portion. Perhaps you want to remove all people, or you just want to erase a stray subject, you can do it from here. This process came with some challenges. First was identifying the best model. This process was already progressing from another task of improving the defurnishing tool. I reviewed a variety of models and found one that appeared substantial and had a version which could run on local hardware. While imperfect this was a big improvement. This model was also promptable and able to do many things well.
The second challenge was working well with equirectangular photos. 360 photos are often not the primary type of photos included in models, which gives them a bias towards 2d images. This shows when whole images are updated and you view them in 360. The seam on the edges of the equirect are very noticeable as the image often changes color or shade at these sides. To fix this required processing edits with the whole image visible, requiring multiple steps, fading the changes, and aligning the outputs; However, this was able to be done in a reasonable time with good quality output.
And lastly was improving the output quality. The 360 camera I use captures about a 12,000×6,000 resolution. Image editors like this often work at about 1,000 x 1,000 resolution. That is a different shape and a vastly different size. While not perfect, the quality can rise with other models tuned for this task. I was able to implement a solution that preserves quality while raising the resolution back to a high level.
This new process also allows for manually touching up the automated defurnishing process. Some features unique to rooms may be preserved or removed between photos, and this allows the ability to more manually choose what to preserve or keep in those cases.
Bonus: Image Enhancements
Until now I often edited images outside of the application and did it based on visual preference. This process can be manual and time consuming. What I began implementing here is an opportunity to automatically edit images and give the user the ability to further tweak these edits to their preference. Automating edits allows the creator to quickly go through the images and review for visual look, stopping to edit the changes when needed.
User Interface Improvements
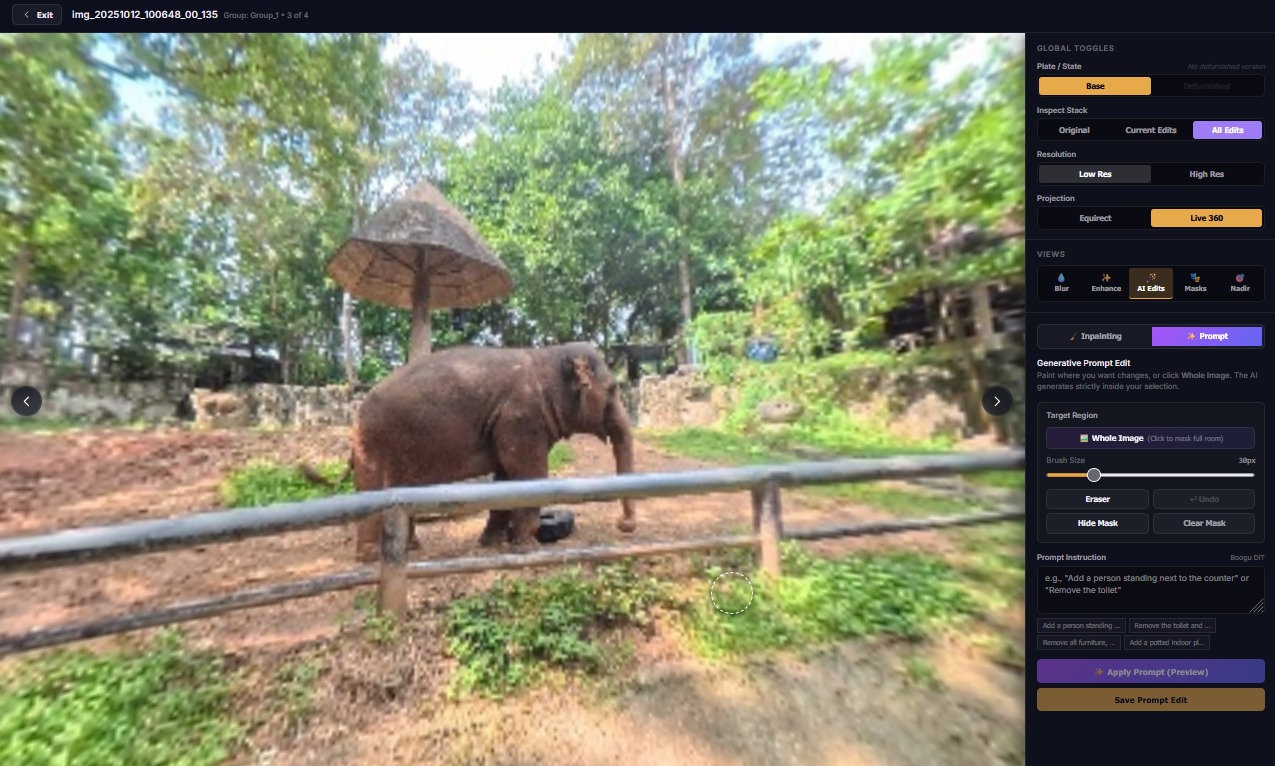
Initially, I viewed selecting an image in the user interface to be a simple viewer, seeing images and seeing what masks were applied (sky, glass, edge). Over time this has expanded as desired opportunities have grown. Blurring information like faces and license plates required the ability to view and edit blur masks. The opportunity to inpaint and hide reflections and shadows also required an interface. These features became quite crowded within the top bar, so I decided to organize the interface with shared features and tabs for each individual one.
This proved to be very helpful. Now, when opening an image, all options are thoughfully placed in groups on the side, with shared toggles between them always available. These shared toggles include things like what resolution you are viewing (low and fast, high and slow) or if you want to view as a whole image or a 360 projection.
It also includes tabs, now you can focus on the task at hand. If you are blurring, view the blur tab and have all the tools. If you are inpainting images, focus just on that. These updates help organize the process as options grow. And, it made adding new options much easier and well integrated.
Bonus: Project Page Organization
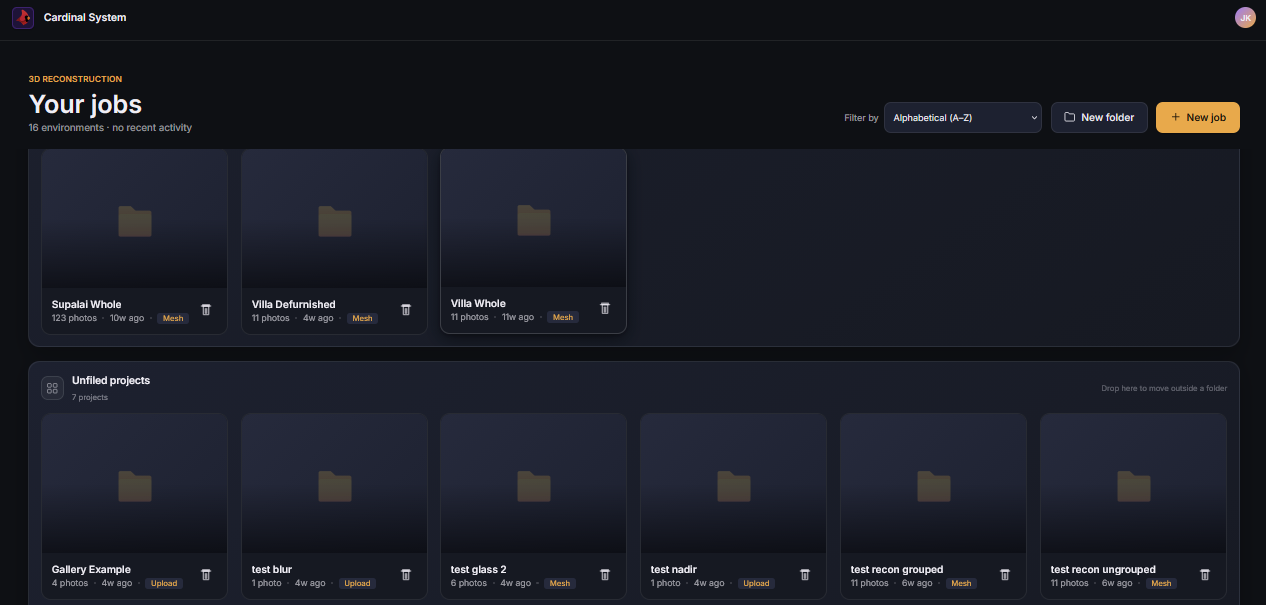
As I continue testing, the number of projects in my project page keeps growing. Sometimes its difficult to find a project I am working on, and many I haven’t touched in a while. So this week I decided to add some organization to the project page. Adding a filters button let’s me organize by ascending name, date, or photo count. I also added the ability to group projects into folders, this way older folders can be ignored, and current projects can be found more easily.
Bonus: Long Text Fix
The final tour is highly editable. The menus can show text with really wide areas, or really small areas. With no limit on the length of text, I was experiencing an issue where text would go beyond the bounds of the area and overlap with nearby text, or it would be cutoff too short. To resolve this I added an ellipses to fit the text within the space. Now an ellipses appears in the center of the text. Now the start and end can be easily viewed for information with longer names.
Summary:
Reconstructing an accurate 3D diorama from multiple sparse 360 images has been a consistent goal since the beginning of this project. Many iterations has seen the model improve consistently while keeping time to complete reasonable. With each iteration the 3D model becomes more robust and conforms to the needs of the viewer. This week more of those needs have been identified and solutions have been tested.
Alongside this research new improvements have been made to the creators tool. Image improvements have been automated, with new manual opportunities available for enhancements and inpainting. The user experience has been better organized, with image editing and project management improvements. All of these work to contribute to a better holistic experience where creative spatial experiences can be designed and produced faster through automation, while balancing the ability for manual adjustments.