
Accomplishments
- Video Integration
- Rebuilt User Interface
Bonus:
- Multi-Crop tool
One of the paramount goals of virtual tour design is to immerse the viewer enough to suspend disbelief so that their mind may experience what it feels like to be somewhere else. These feelings are often the result of what is currently stimulating our senses mixed with our memories of similar stimuli.
Many moments are still, like sitting in a kitchen or viewing a painting in a museum. These still moments often provide a simple stimulus to our sense of sight. Animated moments like walking through a forest or watching the waves on a beach give off strong stimuli to multiple senses. Imagine the whistle of wind through the trees or the touch of mist from a crashing wave. 360 video captures the life of a scene along with audio. Providing a seamless integration of 360 videos into tours can further engage the viewer with the experience and increase the overall impact.
Video Integration
Getting 360 videos to play on their own is a simple process, with examples easily available. Integrating these videos with photo galleries and depthmapped images in a 3D space, however, came with challenges.
Most examples display videos as their own scene. This decision creates conflicts when integrating them into 3D tours. In 3D scenes, images are depthmapped onto the space. This “paints” the photo onto a 3D model at an angle from where the camera is located, providing the optical illusion that you are inside the space. This comes at the cost of slightly more processing to place and stretch the image onto the 3D model. Since this only occurs once per photo, the performance impact is negligible.
Videos, however, are a series of photos—sometimes 30 or 60 frames per second. The same negligible performance cost for a single photo grows massively when applied to video.
Have you ever visited a website and had an unexpected video start playing? Surprises like this can make us uncomfortable. This discomfort puts us on alert and can negatively affect our feelings about an experience. Viewers should decide when a video plays.
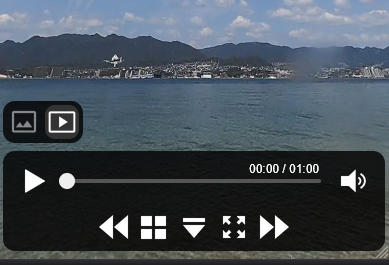
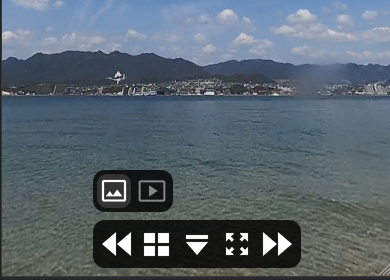
How can we play a video in a 3D space while still using it as a depthmap when navigating the scene, and also give the user agency over when it starts? The solution is to use both a photo and a video. We can export the first frame of a video and use that image for the depthmap. This way, a user can navigate to the scene and be met with a familiar experience.
We can then add a toggle button that alters the user interface and loads the video. Since the image is the first frame of the video, the transition occurs seamlessly. The scene can then load the video without using depthmapping, avoiding the associated performance challenges.
Rebuilt User Interface
Up to this point, the user interface (UI) had been a series of modifications and Frankenstein-style enhancements to the default skin provided in the tool I use. To compound this, each tour type (Gallery, 2D, 3D) had its own skin with its own modifications. Every change I had made so far was quick and effective. The video integration toggle, however, came with a series of more complex changes and animations that broke that streak.
The UI’s architecture was chaotic, included unused features, and was becoming bloated. This made it very difficult to add new features, especially since they needed to be implemented across multiple tour types. I have significantly grown my understanding of the framework and UI design since beginning this project. With this in mind, I decided to rebuild the UI.
Visually, nothing changed outside of the new features. Under the hood, however, the code’s cognitive complexity has been drastically reduced. Actions have been separated into their own files, unused features have been removed, and configurability has been added. This configurability allows the same UI file to be used across different projects. Now, updates and maintenance can be performed on a single file, and the effects cascade to all related projects.
Items in a visual display are often nested within other items, which are further nested within others. If one item changes, parent items may also change or resize depending on their relationship. This made it difficult to animate background resizing because it was a parent to the items within it. When the items inside changed size, the parent would immediately grow.
By changing the layout architecture, it became far simpler to provide a dynamic display of media controls and animate the elements smoothly.
Bonus: Multi-Crop Tool
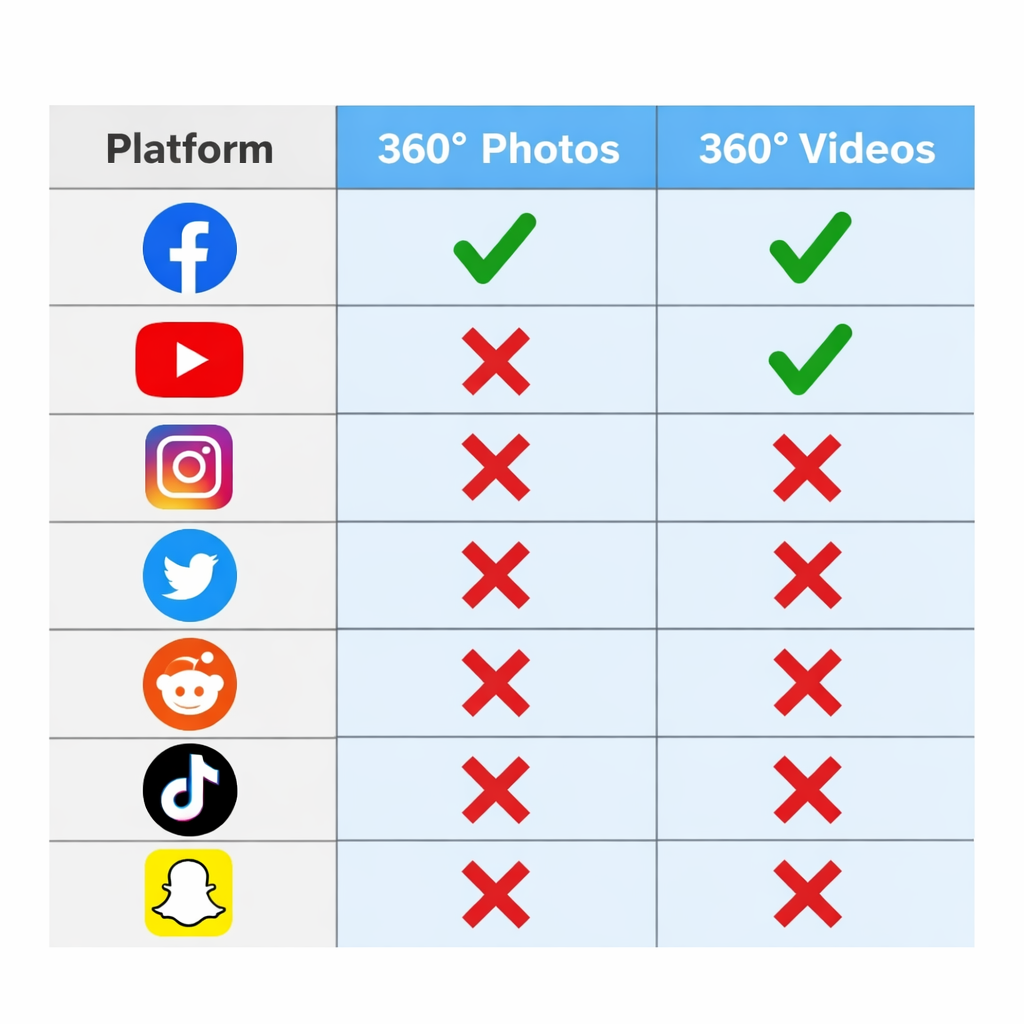
Support for 360 photos is consistently available across devices and web browsers. This makes it surprising that most major social platforms still lack support for it. Facebook supports both 360 photo and video, and YouTube supports video only. How can I share more immersive views within the confines of the tools available on other platforms?
Instagram, Reddit, and other platforms often offer an image carousel. Within it, photos can be viewed one at a time and slide in from either direction. With correctly cropped photos, a rotating view can be emulated using these features. Because each photo is static, it becomes even more important to ensure each image is whole and that nothing critical to the composition is cut off. Splitting someone’s face across two photos, for example, may not be visually pleasing.
I began brainstorming what the process would be to break a 360 photo into these cropped images. Many tools would allow me to manually crop, export, and reposition the images, but this seemed tedious, slow, and prone to error. If I miscalculated where the second or third crop should go, or was off by a pixel, the entire output would be affected.
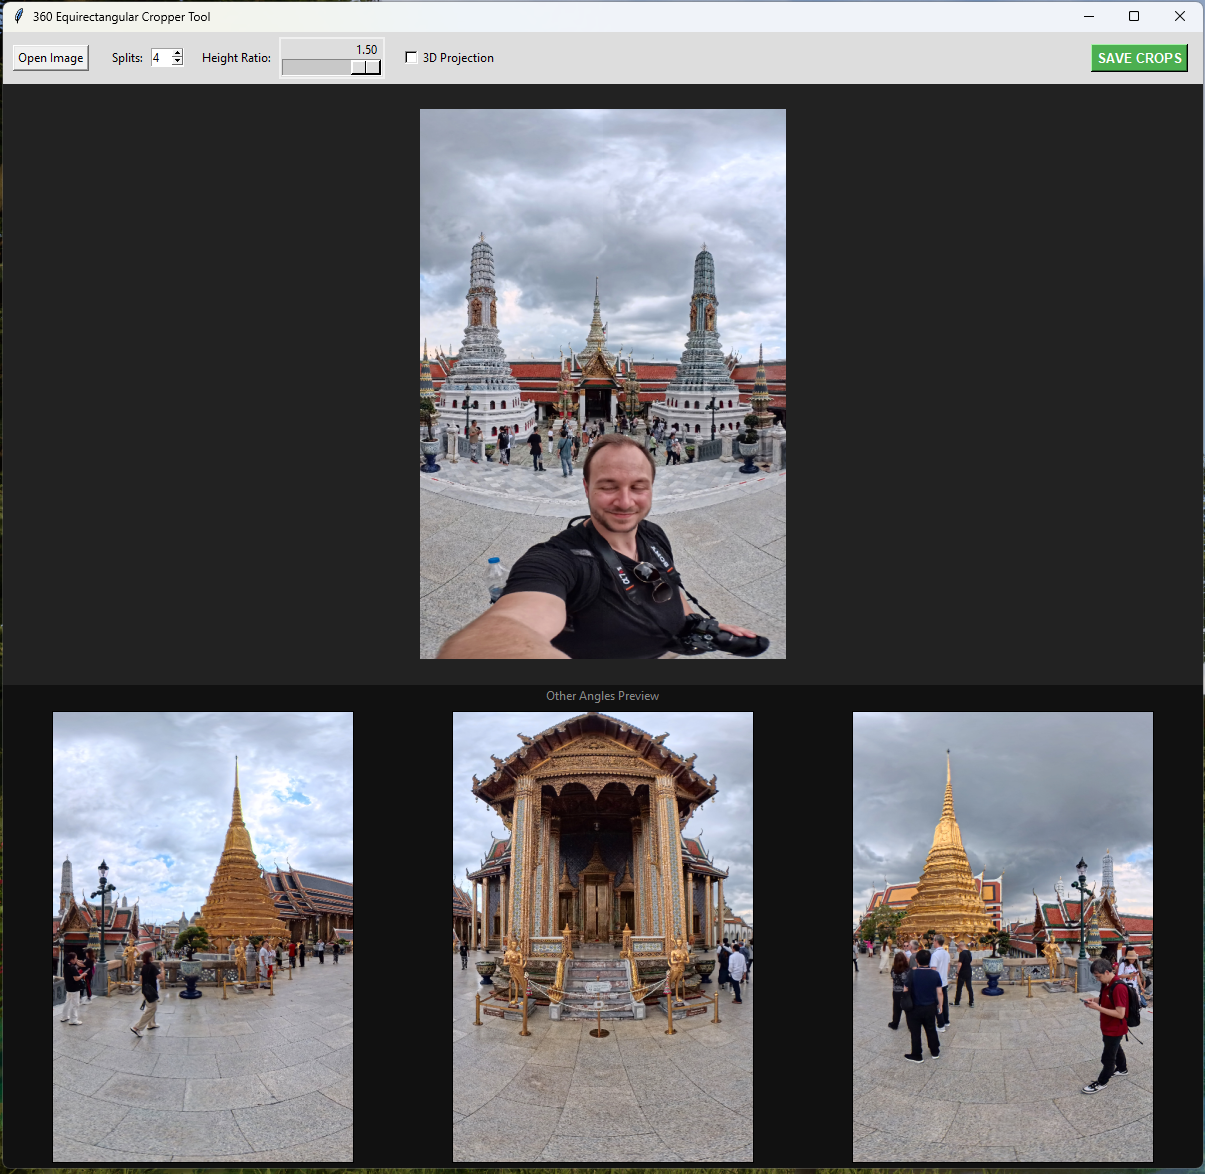
I decided the ideal solution would be one where every crop is immediately visible, and reframing one would automatically reframe all of them. I also determined that adjusting the number of photos and their height might be valuable. After briefly searching for an existing solution and finding none, I decided to build one myself.
After an evening of tinkering, I created a tool for cropping 360 photos. It displays all angles and allows me to adjust the visible width fraction as well as the image’s height. Initially, I thought a 360 projection might appear better with less distortion. In testing, I determined this was not the case. The angles between cropped images became much sharper. While I left the option as a feature, I found that the distortion actually made swiping through the images feel more natural.
With this tool, I can now quickly break out 360 images to share as a sequence of crops across more platforms.
Summary
Going into this week, I expected playing video to be difficult and navigating them to be easy. The opposite proved true and led to a much-needed rework of the user interface. Throughout this project, I identified many new edge cases surrounding video integration and resolved them by addressing root causes and making the project less coupled and more cohesive. I was even able to find enough time to create the multi-cropping tool, which will save significant time in the future.
Now I can offer more stimulating tours with a greater opportunity to capture viewers’ interest and reward them with a more impactful experience. I can also better expose people to what immersive media can offer by more efficiently generating content for common social platforms.