
Accomplishments:
- Automated Tripod Removal
- Automated Hotspot Image Adding in Blender
- Automated Depthmap Tag Translation from Blender to Tour file.
- Automated Tour File Encryption
Bonus:
- Added button to hide all hotspots in tour
360 tour creation requires manual touch-ups and information for each scene or photo used. This is no big deal for a small room, but for a home with over 100 photos it will take forever. I would rather spend time on new features or new tours. To be more efficient, I programmed four new tools that save me hours when making tours.
Automated Tripod Removal
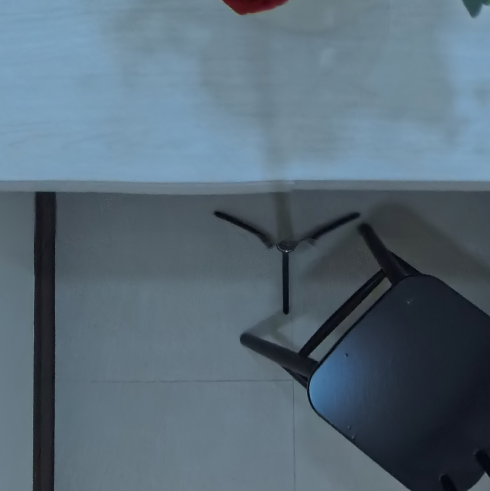


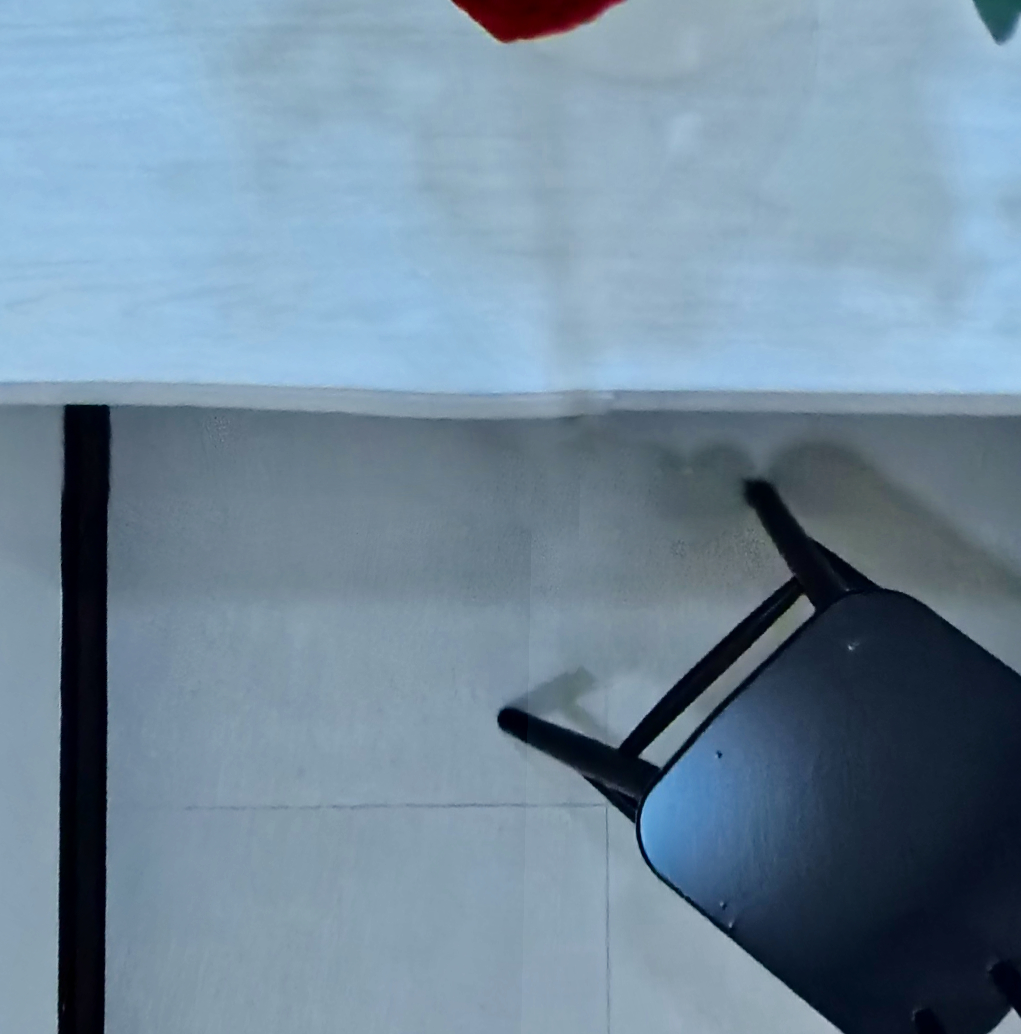
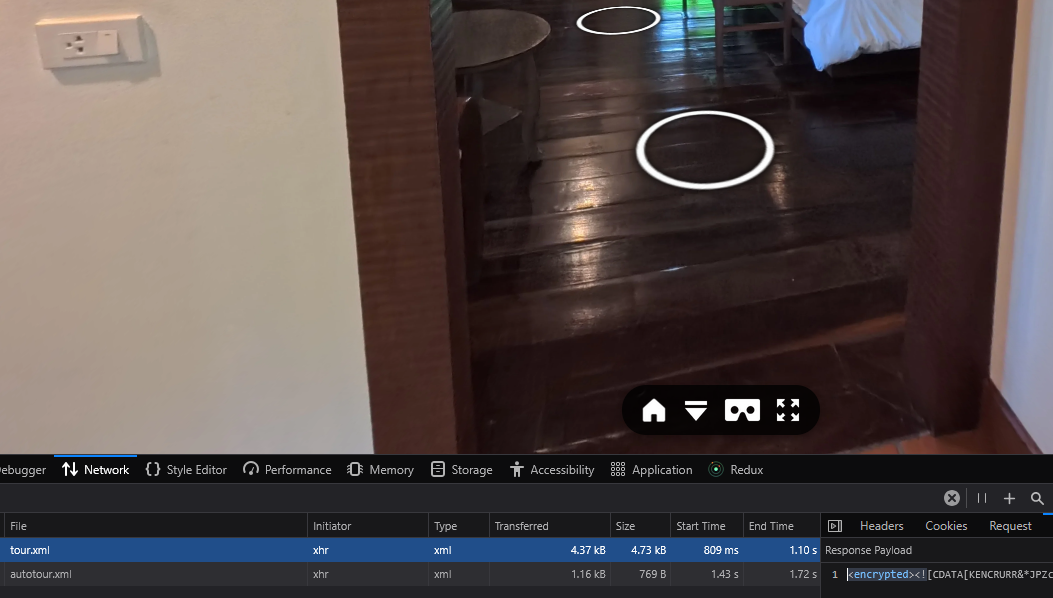
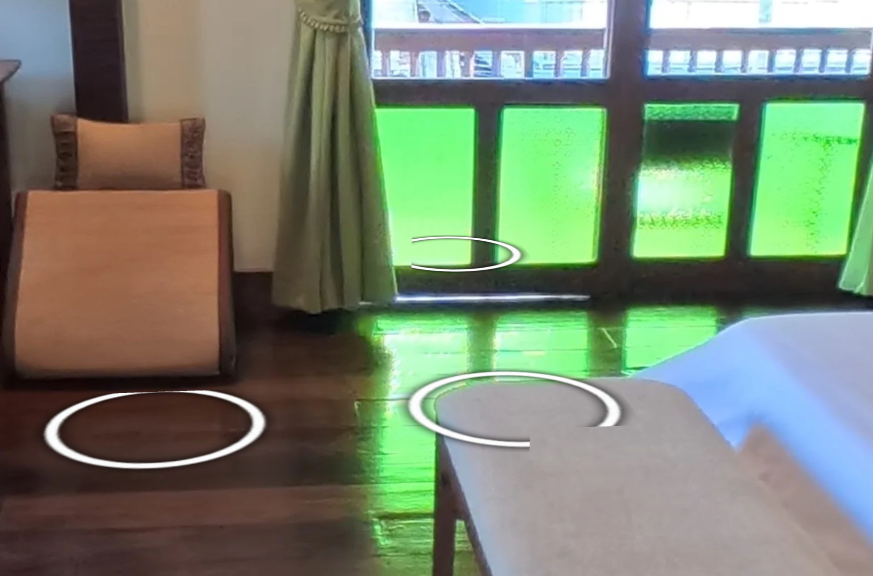
360 photos capture everything, even what’s below them. Modern cameras like the Insta360 series do a fantastic job at removing the tripod pole, which is almost always invisible. The feet are another story. They stick out. While my tripod’s feet are quite small, they appear in every photo. Especially in Virtual Reality (VR), this perception can take the user out of the experience, reminding them they are in a photo. When creating 3D visualizations, these photos are projected onto the space, and the tripod feet get scattered across the floor.
Solutions exist that are successful in hiding the tripod. Insta360 offers a tool to hide the space with a logo or picture. You can blur an entire circle of the space, or manually inpaint the area using a tool like Affinity Designer. However, hiding the space with a logo or blur reminds the viewer they are in a photo and breaks immersion. Inpainting works wonderfully, but it’s manual and unacceptable for hundreds of photos.
I wanted an automated solution that seamlessly erases the tripod feet as if they were never there. This preserves user immersion and saves hours of manual photo editing.
Using ComfyUI’s node editor and an AI image generation model, I programmed an automated solution that removes the tripod feet with an over 85% acceptance rate. The tool takes a folder of images and, for each image, looks only at the bottom. It cuts out a circle where the tripod is expected to be and uses AI to guess what should be there.
An 85% success rate is already great and has saved me hours of manual editing. In the future, better models or training a custom model to detect and remove tripod feet could push this number even higher. This experience taught me how to use ComfyUI’s node editor to automate and manipulate 360 images, as well as how to use live projection mode in Affinity Designer for quick manual touch-ups like removing tripods or reflections.
Hotspot Adding in Blender
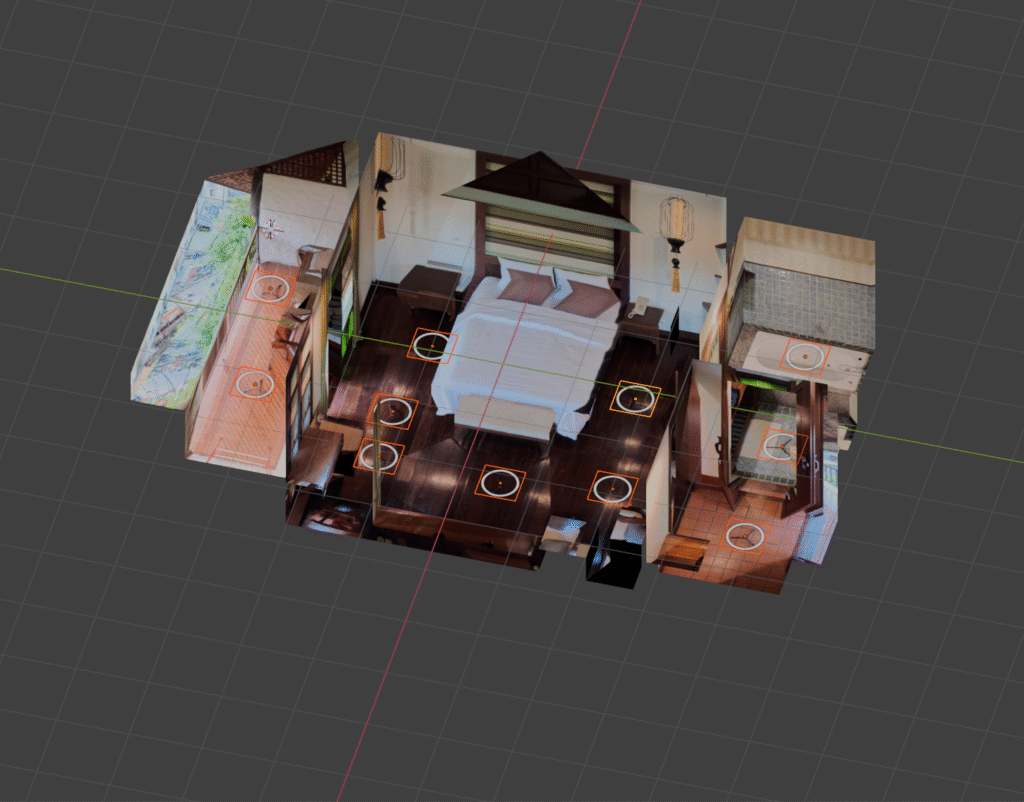
When creating 3D visualizations, I use a tool called Blender. This is where I decide how all of the photos fit next to each other. A manual step is required to add the circular “hotspot” that you click to move to another photo.
For small tours, this process goes quickly. For large tours with 100 or more images, the time can become unreasonably long.
Blender allows scripting using Python. The tool I use to add 360 photos in 3D, called PanoCamAdder+, is written in Python and exposes functionality that can be accessed programmatically.
The tool I created lets me pick the image I want for a hotspot. It then checks the unique name assigned to every 360 photo in the scene and uses PanoCamAdder+ to generate a hotspot image for each one. What once took an hour now happens in seconds with the push of a button.
Automating Depthmap Tags in tour.xml
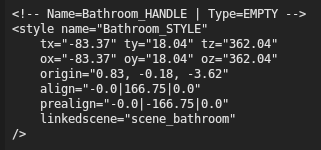
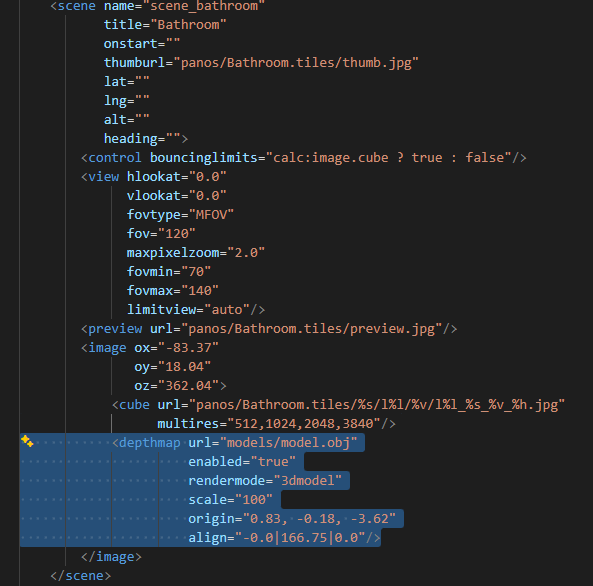
To show 3D visualizations, the 360 tour software needs to know how to display the space and where each 360 photo exists within it. This requires taking the locations of the photos from Blender and placing them into a file used by the tour.
This is not a simple copy-and-paste process. The data from Blender must be written in a specific and organized format. Manually doing this takes time and increases the chance of misclicks or typos, which costs even more time.
I wrote a Python tool to handle these repeatable steps. It takes the data output from Blender and PanoCamAdder+, reads the target file, and inserts the information in the correct locations.
Within seconds, I can now apply all location information to every 360 photo with no manual intervention.
Encrypting All Tour Files
When a 360 tour loads in a browser, the code and related files are downloaded to the user’s device. If a client pays for custom features or if you want to protect your work, encryption makes it more difficult for someone to inspect and reuse that code.
JavaScript and XML encryption is inherently limited because files must be decrypted to run. It’s similar to a locked gate: it doesn’t make theft impossible, but it reduces opportunities.
A typical 360 tour can load dozens of files. Encrypting them individually is easy, but it increases the risk of forgetting a critical file.
Using Python, I wrote a script that scans the tour project folder and automatically encrypts every supported file using the existing encryption tool. While this doesn’t save much manual time, it provides peace of mind by ensuring that all files are protected consistently.
Bonus: Hide All Hotspots Button
Immersion has been on my mind lately. When someone enters a virtual space, they imagine what it feels like to be there. Our minds quickly notice what doesn’t belong. If a room is full of white circles overlapping tables or doorframes, it becomes harder to maintain the illusion.
I added a feature that allows users to hide all hotspots with a single click. This lets them immerse themselves more fully in the environment and view the entire 360 photo without navigation elements getting in the way.
Summary
The new year is off to a great start. I’m curious how much time I’ll save thanks to the effort put into these tools during the first week. Beyond time savings, I believe these improvements directly increase the value of the 360 tours I produce. Viewers should get more out of each photo, with greater immersion and fewer distractions.
I’ve already applied many of these tools to the Villa Korbhun Kinbua tour in Chiang Mai, and they will also be used in the in-progress 3D visualization for the Supalai Place tour in Bangkok. Feel free to check these out and stay up to date with the progress.